The start of a new adventure.
For many years I toyed with the idea of working with polymer clay. I was aware of this medium back in the 80's when I bought a pair of earrings that were daffodils. I loved them but they didn't last very long before petals broke off and I thought anything made with polymer clay was not strong or durable.
Fast forward to 2008 and and a Bead and Gem show that I attended with a girlfriend. We were fascinated by the jewellery made with polymer clay and I bought quite a few pieces of equipment and clay. I did little with this as card making had taken hold of me and I was still working full time as well.
Jump forward again to 2016 and I have retired so off to have some lessons in how to make polymer clay canes and how to use them. The lesson were informative and I got a lot from them but did little with the information because I was still deeply committed to card making and DH (darling husband) was keen on traveling both overseas and with our brand new caravan.
I'm glad we did this because we arrived home from our last overseas trip and within months we were in lockdown but it is only this year after loosing the will to make cards that I have once again pulled out all my polymer clay. Remarkably the Kato clay I purchased back in 2008, 15 years ago, is still usable, takes a little longer to condition and I add a little Kato liquid clay to it but after about 20 minutes it is conditioned and ready to use.
I have been playing for the past couple of months and am allowing myself a full year to hone my skills and produce some fine original jewellery. I will then think about an Etsy store and markets etc. It would be great if I could fund my hobby. However it is my hobby and the mental health and creative benifits far outweigh any income derived from it.
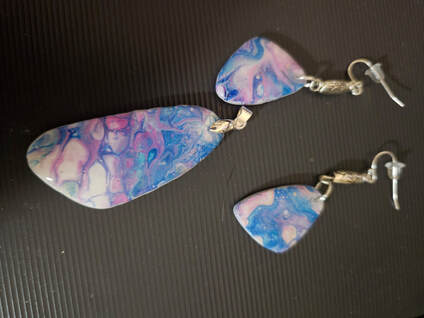
This set of earrings and pendants are the first successful sets in my clay adventure and are created by paint pouring

I have used Judikins Diamond Glaze for these sets as I haven't got the UV resin sorted quite yet.

I already had all the findings and lots of beads and gems that I can use.
I have in the past made jewellery for family and friends and collected beads from all over the world.

This set is my most recent set and the third attempt at making them.
The first attempt I ruined them with UV resin (had no idea what I was doing)
The second set I burnt
Third time lucky but I learned a lot.
I am keeping a diary with all my mistakes as well as my triumphs.
These look really good with a brown top of the same colour and black pants.
