Vitu Maradadi (pretty things)
  • Cards
  • Parchment Cards
  • In to Africa
  • We are family
  • About me
  • Polymer Clay Beads and Bling

CC&S Challenge #277, SCSCCJUN18, Cosy Christmas 2018

26/6/2018

0 Comments

 
Picture
Picture
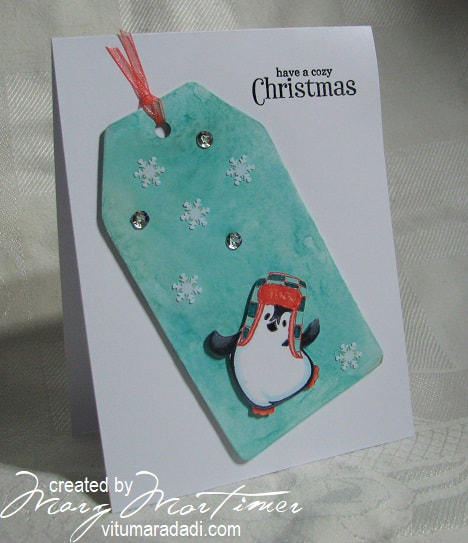
Decided to get myself motivated and do a Christmas challenge, I also thought I would use the colours over on the Case Colours & Sketches challenge but missed the upload by a smidge, never mind it gave me inspiration.


​Part of the problem was my camera ran out of battery power just as I was about to take the photos and I discovered we only had three AA batteries left so there was a mad scrabble to fine a fourth battery that would work, hence me missing the CC&S cutoff time, serves my own right for leaving it so late lol, but it's an ill wind that blows no one any good and it got me motivated to add to my Christmas stash.
​

Picture


Picture
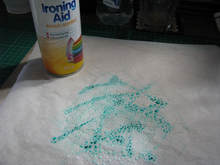
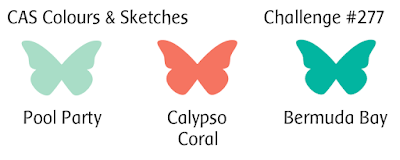
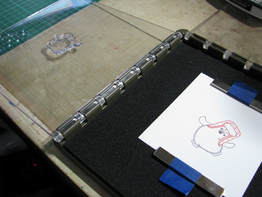
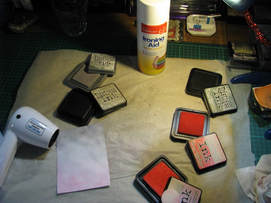
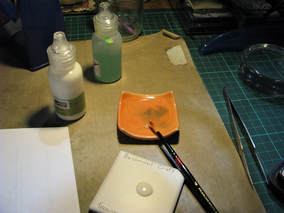
I slapped and then squirted some SU Pool Party and Bermuda Bay onto some baking paper and sprayed it with ironing aid. ​
Picture


​I laid the tag into this ink several times until I was happy with the coverage drying between each laying. Last for this section I slapped some Distress Oxide Evergreen Bough down, sprayed it and then laid the tag back into this ink. Once the tag was dry I gave it a light spritz with home made glimmer mist.

Picture


Picture
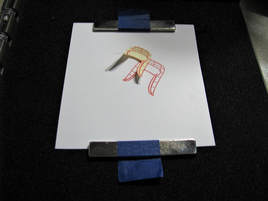
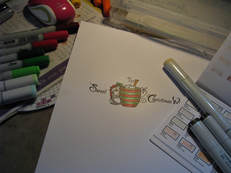
I stamped the little hat onto some blending paper masked it then over stamped the penguin using both lids of the SU Stamparatus (love this piece of equipment)

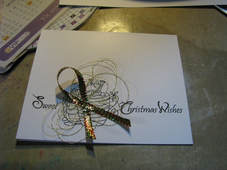
I coloured the little penguin fussy cut and then mounted him on some craft foam and added him to the tag, I then added the embellishments and mounted the whole thing onto more craft foam.

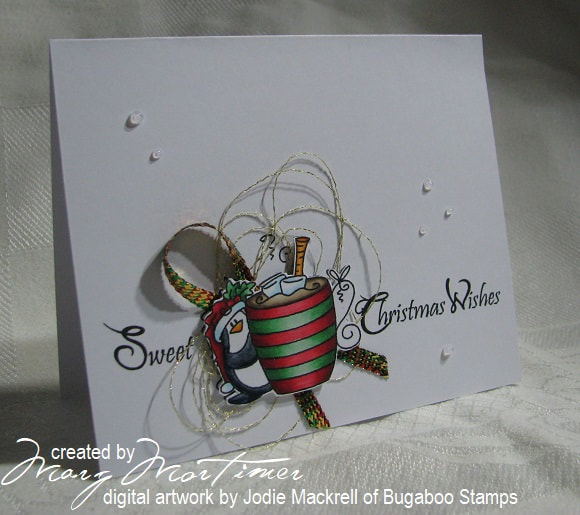
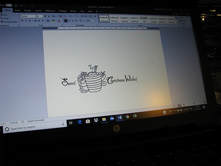
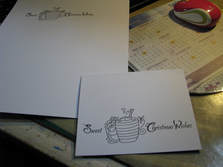
​I worked out where I wanted the greeting, stamped it and then over stamped with watermark and clear heat embossed it, added the ribbon and attached the tag to the card base and there you have it.

Resources;
Stamps: 
Uniquely Creative -
UC1705 Penguin Pals Kit 
Hero Art - CM100 Christmas Messages.

Paper: 
X-Press It Blending Card.

Paper Size: 
Base = 11 cm x 15 cm

Ink: 
Versa Mark - Watermark.
Memento - Tuxedo Black.
SU - Bermuda Bay, Pool Party & Calypso Coral.
Ranger Distress Oxide - Evergreen Bough.
Accessories: 
Portacraft Swing Tag.
Copic Markers; R02,R05, BG32, BG49, B0000, B000, C-5, C9, B39, 100.
Snowflake & sequin embellishments from Uniquely Creative Penguin Pal kit.
Bellbird Paperarts - Super fine clear embossing powder.
Tombo multi glue.
SU Ribbon Everyday Enchantment Organdy - Calypso Coral 
Portacraft EVA craft foam white
SU Mini Glue Dots (for positioning ribbon)

I hope you enjoyed reading about this cute little card as much as I did making it.
There are three more very cute penguins in this stamp set along with three more hats of various designs to pop on their heads.
Feel free to use the card as inspiration.
​Cheers Marg
0 Comments

CC&S #276 & SCSCCJUN18 challenges "Treats for Christmas"

18/6/2018

3 Comments

 
Picture
This card is for two challenges, the CAS Colours & Sketches current challenge found here; http://cascoloursandsketches.blogspot.com/2018/06/challenge-276-sketch.html

The Fan Club Christmas challenge over on SCS found here; ​https://www.splitcoaststampers.com/forums/christmas-challenge-f421/june-2018-christmas-challenge-t624564.html, you do need to be a Fan Club member to access the second challenge.
Picture


​
​I first created the greeting using two different fonts, one for the capital letters and another for the body of the words.
I then pasted the digi image between the greeting words.


Picture
​

​I had the collective image at the top of the A4 card initially and printed it off like this but that was a mistake as I wonted a single layer card, however all was not lost as I decided to mount the digi image as a 3D so used the first print for this and then moved the collective image down to the bottom of the A4 card and printed again.

Picture


​Because I had an image it was quite easy to place the gold thread and the ribbon and it was easy to see where both the thread and the ribbon would peep out from the coloured image. 
I attached both the ribbon and the thread with some double sided tape putting the tape down first then just laying the ribbon and thread over it.

Picture

​This photo is a bit grainy but shows the digi image before I fussy cut it. Once that was done I mounted the image onto some white craft foam with Tombo Multi glue, let it bond under pressure for about ten minutes then mounted that sandwich onto the card base placing the coloured image directly over the image on the base with the ribbon and thread. 
the only other thing left to do was to add some Nuvo drops to the card to give it a bit of added interest

Resources;
Stamps: Bugaboo digital - Poppi xmas cocoa.
Paper: X-Press It Blending Card
Paper Size: Base = 13 cm x 11 cm
Ink: Epson Bubble Jet Printer ink - black
Accessories: Copic markers; C-1, C-3, C-5, C-9, B39, B0000, B000, G12,G14,G07,G28, Y35,YR04,YR16, R35,R46,R59, E42,E44, E47.
Craft foam
Gutermann Gold thread.
Perfect for All Xmas Twine.
Nuvo Glitter Drops - White Blizzard.
​Tombo Multi Glue.

I hope the card has inspired you 
​Cheers Marg

3 Comments

MMTPT514, Paris in the Spring

4/6/2018

0 Comments

 
Picture
This card is for the teapot challenge for this week to create a card using a song.

For this card as you can see I have gone with "Paris in the Spring" and like one of my co members of SCS, Sabrina I would be happy to be in Paris any time of the year. We spent three days in Paris at the end of summer in 2014 and all it did was wet my apatite. I loved it, so when we were heading back to the British Isles in 2016 we spent six days in Paris at the very beginning of Spring.

Paris is my favourite city in the whole wide world apart from my home town of Brisbane lol. 

I bought the Paris die at the Paper Craft show last year and that same craft show is this week and I haven't used the die so it was the perfect opportunity.

I'm going to give this card to a friend who has just come back from her first trip overseas at the age of 81 that included Paris.

The card is fairly simple I layered the die image four times with the top layer being cut from some background paper I made with the Slap & Squire technique and I put glitter on the Eiffel Tower part of the die. I mounted the rest of the greeting on some craft foam and that's it.

I know the DP is cherry blossom but it reminded me of Paris and I like the colours. I have also been told that there is cherry blossom near Notre Dame 
Resources & Techniques
Paper: SU A4 Card Stock - Smoky Slate, Powder Pink. PortaCraft A5 glitter paper - pink. Daiso Double Sided Chyogami paper - Cherry at Night. X-Press It Blending Card (for base)
Paper Size: Base = 10 cm x 14 cm
Ink: Ranger Distress Inks; Spun Sugar, Worn Lipstick, Pumice Stone, Iced Spruce. Distress Oxide - Hickory Smoke.
Accessories: Baking paper, Simply Dies - SDSE7062 Paris. Cuttlebug a2 embossing folder - Leafy Branch. Dymo Letratag - clear label medium. Bellbird Papers 008 Diamond Glitter. Aqua adhere glue. Tombo Mono glue. X-Press It High Tack Double Sided Tape.
Techniques: Dry embossing, Slap & Squirt background.
Picture


​I first laid colour down on some baking paper using the Slap & Squirt technique to create some coloured card stock to cut the top layer die

Picture


​The top die cut from the coloured card stock and a plain cut die for sandwiching. I cut four white images with the die to give the final image stability and some height.

Picture


​I use aqua adhere as the glue to sandwich each of the die cuts together, the reason being the glue stays wet for quite a few minutes allowing you to move the die cuts around.

I prime the paint brush that I apply the glue with to the die cuts with ordinary washing up detergent and then wipe it off slightly.
This allows easy cleaning of the brush after use.

Picture


​I use a pointy nosed pair of tweezers to sandwich the layers together, one layer at a time allowing each layer to dry before starting on the next, about 15 minute between layers.

Picture
This image shows the completed sandwich and a view of the tweezers used.

Once the sandwich was completed I brushed some glue over the Eiffel Tower section of the die and sprinkled diamond glitter over it. Diamond glitter is a very fine glass glitter that absolutely sparkles.

I cut two strips of pink glitter paper and butted the strips up against the cherry blossom paper then mounted this onto some soft pink card stock to give it stability.

I embossed some Smoky Slate card stock and then mounted the panel onto this. Finally I glued the die to the front and made the rest of the greeting with my Dymo tag maker and mounted this on some smoky grey and a little craft foam.

I finished the card by putting a strip of the cherry blossom paper on the inside of the card with some white card stock for writing on mounted on some of the soft pink card stock to create a border.

I loved making this card and in reality it didn't take too long.

I hope you enjoyed my description, thanks for looking cheers Marg. 
0 Comments

A Day with Katie Kaup

4/6/2018

0 Comments

 
Picture
Spent yesterday, Sunday 3/06/2018 at Stampin' Up demonstrator extraordinaire Katie Kaup's place making cards. Had a great day and will have to say Katie is so generous both with her time and talent and her supplies.
​Thanks so much Katie. 
Picture
Picture
Picture
Picture
0 Comments

"Your Wings Exist" CC&S #274 &  MMTPT514

2/6/2018

2 Comments

 
Picture
Picture
This card is for two challenges.
#1 CAS Coulours & Sketches #274 to use the sketch and the colours Hello Honey, Tangelo Twist & Basic Grey. Challenge found here; http://cascoloursandsketches.blogspo...74-double.html 

#2 The Teapot Tuesday Challenge MMTPT514. Found here; https://www.splitcoaststampers.com/f...g-t624522.html 
This week we were to be inspired by our favourite song. This is always a bit of a problem for me because I'm not much of a music follower, that's not to say i don't enjoy it I just never think to listen to music much preferring piece and quite and the natural sound of birds and nature.
There is one song that has absolutly blown me away for it's clarity and depth though and that's Eve Cassidy's Fields of Gold, watch it here; https://youtu.be/9UVjjcOUJLE

To depict the fields of barley I have used the Belleek background technique found here; https://debbiesdesignsblog.blogspot....sday-tips.html and the colours for the CC&S challenge where perfect.
It was quite easy to do. I used three of the border dies out of the set to achieve the border for the quote panel and I clear embossed the quote after first stamping it with SU - Basic Grey and mounted the quote panel over the other panel with craft foam and attached both layers with Tombo mono glue painting it on with a paint brush which I first dip in normal washing up detergent.

Products used;
Stamps: Unity - Phyllis Harris / Your Wings Exist PH-896A
Paper: SU A4 Card Stock - Hello Honey, Tangelo Twist & Basic Grey. X-Press It Blending Card (small piece for quote)
Ink: Versa Mark - Watermark. SU - Basic Grey & Tangelo Twist.
Accessories: Cuttlebug embosing a2 embossing folder - Bird Call. Brayer. Spellbinders Borderabilities - Curved Borders Two. Craft Foam. $2 satin & organza ribbon. Embossing Powder - Clear. Tombo Mono Multi - liquid glue. X-Press It High Tack Double Sided Tape.......and that's all folks, thanks for looking.
Cheers Marg
2 Comments

    Author

    Hi I'm Marg living in Brisbane Queensland Australia, see About me page for more information

    Archives

    February 2020
    August 2019
    March 2019
    September 2018
    August 2018
    June 2018
    May 2018
    April 2018
    January 2018
    May 2017
    March 2017
    February 2017
    January 2017
    September 2016
    August 2016
    July 2016
    March 2016
    February 2016
    June 2015
    May 2015
    February 2015
    June 2014
    March 2014
    February 2014
    October 2013
    September 2012
    August 2012
    July 2012
    April 2012
    February 2012
    January 2012
    June 2011
    May 2011
    April 2011
    February 2011
    January 2011
    December 2010
    November 2010
    October 2010
    September 2010
    August 2010
    July 2010
    May 2010

    Categories

    All
    Anniversary
    Birthday
    Christmas
    Copic
    Copic Oz Challenge
    Copic OZ Challenge.
    Copic OZ Challenge\\
    Digi Art
    Easter
    Embossing Folders
    Fathers Day
    Flowersoft
    General
    Get Well
    Halloween
    Heat Embossing
    Magnolia
    Male
    Marbling
    Mothers Day
    Penny Black
    Pirates
    Salt Resist
    Salt Technique
    Scs Challenge
    Special
    Spellbinders
    Stampin Up
    Thank You
    Tim Holtz Inspired
    Unity Stamps
    Valentine
    Vsn


    Picture

    Picture

    Picture

    Picture

    Picture

    Picture

    Picture

    Picture

    Picture

    Picture

    Picture

    Picture

    Picture

    RSS Feed

Powered by Create your own unique website with customizable templates.