This card is for the "Fusion Card Challenge" found here; http://fusioncardchallenge.blogspot.com.au/
I have only just started doing these challenges having discovered them via another design team member on Split Coast Stampers (SCS) "Linda Callahan", thanks Linda.
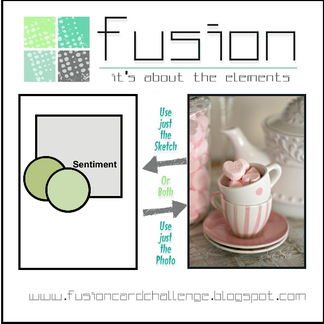
Basically as the photo opposite indicates you can use either the photo or the sketch supplied for inspiration or you can use both, that's where the fusion comes in. I prefer to use both
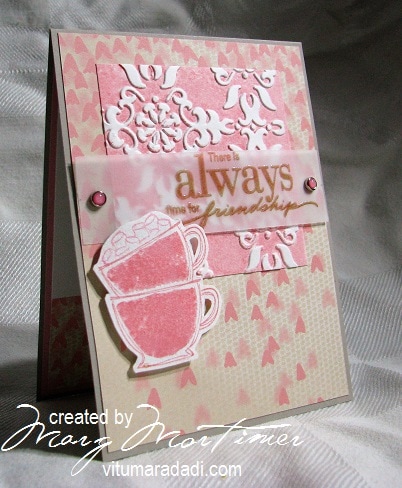
For this card I have gone with the pinks and used Stampin' Up's Blushing Bride as the main colour.
For some reason the pattern on the teapot in the background just jumped out at me and I straight away thought of the "Belleek" inspired technique.
I thought we had this technique on SCS but couldn't find it then remembered that another brilliant, talented SCS member "Kitty Caracciolo" had used this technique and sure enough there was a very good tutorial that can be found here;
http://www.kittiekraft.com/belleek-inspired-technique.html
Kitty's gallery of Belleek inspired cards is amazing with the most gorgeous cards and well worth a look and is found here;
http://kittiekraft.typepad.com/kittiekraft/belleek-inspired/
I have only just started doing these challenges having discovered them via another design team member on Split Coast Stampers (SCS) "Linda Callahan", thanks Linda.
Basically as the photo opposite indicates you can use either the photo or the sketch supplied for inspiration or you can use both, that's where the fusion comes in. I prefer to use both
For this card I have gone with the pinks and used Stampin' Up's Blushing Bride as the main colour.
For some reason the pattern on the teapot in the background just jumped out at me and I straight away thought of the "Belleek" inspired technique.
I thought we had this technique on SCS but couldn't find it then remembered that another brilliant, talented SCS member "Kitty Caracciolo" had used this technique and sure enough there was a very good tutorial that can be found here;
http://www.kittiekraft.com/belleek-inspired-technique.html
Kitty's gallery of Belleek inspired cards is amazing with the most gorgeous cards and well worth a look and is found here;
http://kittiekraft.typepad.com/kittiekraft/belleek-inspired/
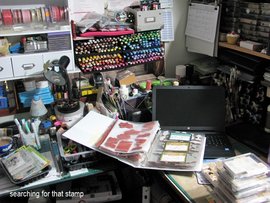
So back to the card. Finding the right stamp for any card is always a bit of a mission, I have over 7,000 stamps, wood mounted, unmounted, acrylic and some weirdo foamy things too.
This photo is the creative corner of my craft room while the search is on.
I finally settled on the cup out of an SU set "Like it a Latte", the greeting is from a Hero Arts Poly Clear set - CL493- Live Life.
I used watercolour paper 180 gms as I was intending to add stripes to the cups but changed my mind, I used the stamp positioner because I had to re stamp the image several times to get the coverage and knew that that would happen because of the watercolour paper.
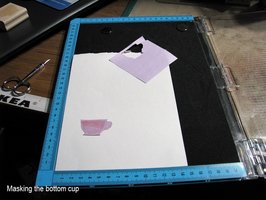
I stamped the image onto a piece of "Post It" note paper as a mask, covered the image and re-stamped at a slight angle over the top to give the impression that the second cup was inside the first. I then masked the second cup and added little marshmallows to the top, this stamp is from the same SU stamp set.
I stamped the image onto a piece of "Post It" note paper as a mask, covered the image and re-stamped at a slight angle over the top to give the impression that the second cup was inside the first. I then masked the second cup and added little marshmallows to the top, this stamp is from the same SU stamp set.
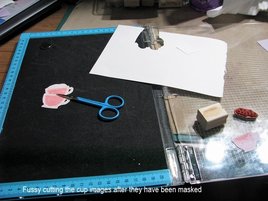
Once all the stamping was done I fussy cut the image leaving a little border (just like all these new fangled purpose made dies do) and mounted it onto some white craft foam then set it aside to dry. You can also see what I do with my wood mounted stamps, I simply pull them off the wood block and because they are quite tacky they mount onto the stamp positioner perfectly, once used I simply place them back on the block.
Next I did the Belleek inspired focal square. I wanted a really good impression without the paper cracking or tearing from the pressure so I used the 180 gm watercolour paper again, this time I sprayed the back of it with a light mist of water and let it soak in. While this was happening I inked up my brayer with SU Blushing Bride ink rolled this over my embossing folder making sure I had very good coverage (I did this about three times) then carefully placed my paper in the folder and ran it through the Sizzix. It came out perfectly I just had to dry it off a little. For this technique to work well you need embossing folders that have a reasonable amount of background space but not too much then follow Kitty's instructions and you can't go wrong.
The rest of the card is just mounting all the pieces together. I did have one quandary and that was how to add a greeting without it impacting on the Belleek square. I finally settled on a panel of velum using SU Soft Suede then over stamping with Versa Mark and clear heat embossing for a little added internist. I attached thsi with acouple of brads that I have no idea where they came from they are that old.
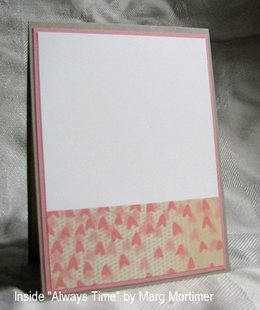
I finished the card off by using some of the SU design paper - Falling in Love, which I used on the front of the card.
The card base = 11 cm x 15 cm and is SU Sahara Sand I also used some SU Blushing Bride card stock to mount the inside of the card.
Adhesives used were X-Press It High Tack Double Sided Tape 12mm (love this stuff and go through meters and meters) and PVA glue for attaching the craft foam.
That is it folks, thanks for dropping by to have a look I hope you found inspiration and that you will give this challenge a go.
You can find more of my cards over on my SCS gallery along with heaps of challenges and support, found here;
http://www.splitcoaststampers.com/gallery/showgallery.php?cat=500&ppuser=198941
Cheers Marg


 RSS Feed
