Today's card was actually done yesterday, just a little slow with the upload.
It is for the SCS Technique Lovers Challenge TLC595 found HERE the Mojo Monday challenge see second photo for more details and also Kathy Racoosin's 30 day color challenge on her blog The Daily Marker found HERE
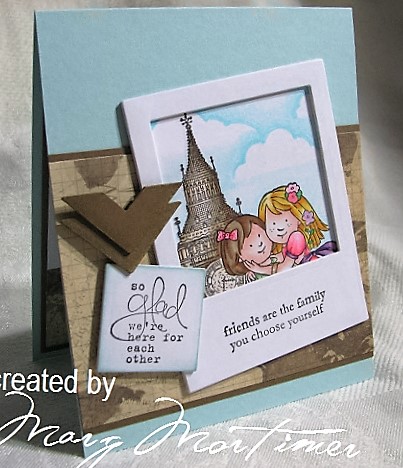
The SCS TLC was to make a card with a selfie element on it. I found this hilarious because we have just been overseas to Europe and Great Britain and there was an awful lot of people taking selfies, in fact they would often be standing in front of a landmark or historical building and almost completely block it out.
We found this very peculiar.... maybe it's our age.
If you like my card and you are thinking of having ago yourself check out Amy Lee's tutorial, there is a link on the TLC595 page.
You will also notice that this post has a lot more photos and information, I can't promise that every post is going to have so much detail but I am going to try and put more into the posts just because I like to share and get excited when I discover new things usually from Jennifer McGuire or Sandie Allnock who I follow.
It is for the SCS Technique Lovers Challenge TLC595 found HERE the Mojo Monday challenge see second photo for more details and also Kathy Racoosin's 30 day color challenge on her blog The Daily Marker found HERE
The SCS TLC was to make a card with a selfie element on it. I found this hilarious because we have just been overseas to Europe and Great Britain and there was an awful lot of people taking selfies, in fact they would often be standing in front of a landmark or historical building and almost completely block it out.
We found this very peculiar.... maybe it's our age.
If you like my card and you are thinking of having ago yourself check out Amy Lee's tutorial, there is a link on the TLC595 page.
You will also notice that this post has a lot more photos and information, I can't promise that every post is going to have so much detail but I am going to try and put more into the posts just because I like to share and get excited when I discover new things usually from Jennifer McGuire or Sandie Allnock who I follow.
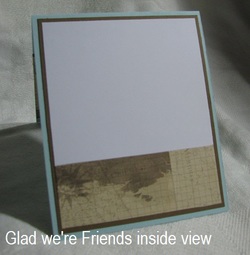
Before we get stated with the hows, whys and wherefores this photo is of the inside of the card.
There is no point in making a beautiful card on the outside unless you finish it off inside too.
This is my preferred way of doing the inside of a card and if you look at the previous post you will see that I have used two DP (designer paper) strips.
I also quite often sponge around the white card stock to give it a little more interest and you can also see what that looks like in previous posts.
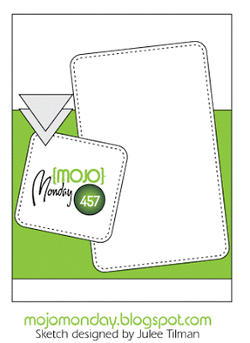
As mentioned above this card is also for the Mojo Monday challenge mojo457 found HERE
This sketch design lent itself easily to the SCS challenge and the color choice comes from the DP and what would go with it, hence the mid brown and soft blue.
Because selfies usually are taken when people are out and about I wanted DP that had a travel feel to it, another reason for the choice.
The completed card measures 11 cm x 13 cm
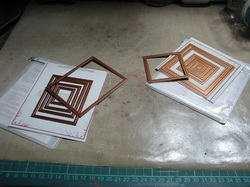
To get the photo effect (someone commented on the card in my SCS gallery and called it a Polaroid) I used Spellbinder dies.
The large rectangle dies, the largest one and the third largest die from the small square set were used and worked well.
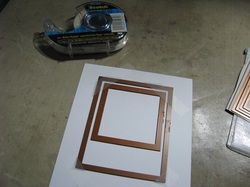
I placed both dies in the position I wanted them on a scrap of card stock then anchored them with removable magic tape.
I then ran this threw my Big shot with a piece of shim so that there would be an embossed border around the cutout areas.
Using shim just adds a little more pressure to the rollers. I save the backing card from embossing folders as my shim although I do have embossing mats and a metal plate as well.
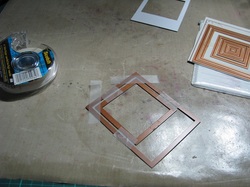
I carefully removed the first lot of card stock from the dies and then anchored both dies together even more making sure not to move them.
This is very important as I wanted to cut a further four frames and they all needed to be exactly the same.
With each of the following four cuts I didn't use shim as these frames are just going to form the frame giving it dimension.
The squares from the die cuts were also saved for later use.
This is very important as I wanted to cut a further four frames and they all needed to be exactly the same.
With each of the following four cuts I didn't use shim as these frames are just going to form the frame giving it dimension.
The squares from the die cuts were also saved for later use.
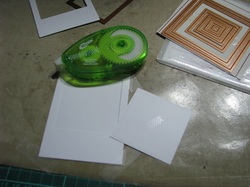
I then cut out a solid rectangle which was going to be my base and the area that was going to have the image on it.
To make sure I got the image in the right spot I took one of the frames and put it onto the base I then took one of the centre squares put a very small amount of re-positional dot tape on the back and put it back into the square space on the frame, then carefully removed the outer frame
To make sure I got the image in the right spot I took one of the frames and put it onto the base I then took one of the centre squares put a very small amount of re-positional dot tape on the back and put it back into the square space on the frame, then carefully removed the outer frame
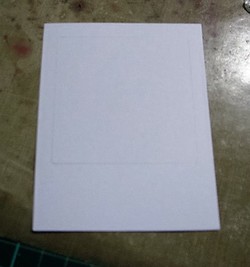
Once the outer frame was removed I drew around ht square that remained on top of the base with a pencil.
You can just see the outline in the photo.
This is a fairly important step as you need to know where to place your stamps and where the border is going to be when you put the card together.
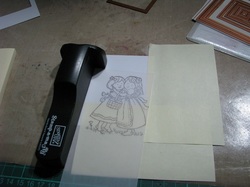
I don't have a misti (I'm hoping santa will bring me one for Christmas) but I pretty much get most effects using my trusty SU Stamp-a-ma-jig.
I use vellum to stamp the image for positioning and I mask of with post it notes.
For those of you who have never used a stamp position-er it is quite easy and it doesn't matter which brand you have they all work pretty much the same.
You need something you can stamp on that you can also see through and has straight edges, vellum is perfect.
You line the vellum up against the position-er having it fit snugly into the T section then you also line the stamp up so that it fits into the same T section and stamp the image.
Once you have the image on the vellum you place the image where you ant to stamp it on your card and once again line you position-er up against the vellum then remove the vellum and place the stamp up against the position-er and stamp. Your image / greeting will be exactly where you want it.
I also use post it notes for the actual masks of images. Stamp you image making sure some of it will be where the sticky part of the post it note is then simply cut out the image and stick it over your stamped image.
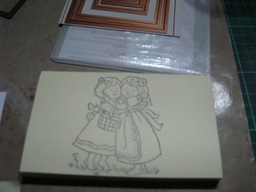
Here you can see the finished stamping before I colored it.
The little girls were stamped first then masked.
The image of Big Ben was stamped over the top but looks like it was stamped first as it is behind the girls.
Masking helps to achieve dimension and you can also see why it was important to draw the square in, at this point I rubbed the pencil marks away.
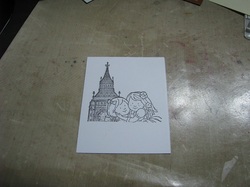
Once I had colored the image on the base I needed to put the frame around it to make it look like a photo.
I have used a technique I learned over on Jennifer McGuire's blog and I just love it and have used it several times.
You can find the video on it HERE
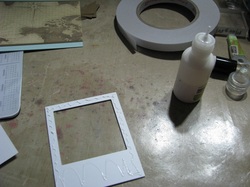
Take one of the frames, place some craft glue (I prefer craft glue because you can slide your frames or elements around and line them up properly) around the edge and lay it onto the next frame, do this with all the frames making sure that your top frame has any stamping on it before you glue it to the rest, you don't want to make a mistake and then have to peel them apart.
I did the same thing with the little square with the second sentiment on it using the centre square area saved from the square die and cutting them down to the right size with the appropriate die then gluing them all together and sponging some SU Soft Sky around the edge to finish off.
I have used a technique I learned over on Jennifer McGuire's blog and I just love it and have used it several times.
You can find the video on it HERE
Take one of the frames, place some craft glue (I prefer craft glue because you can slide your frames or elements around and line them up properly) around the edge and lay it onto the next frame, do this with all the frames making sure that your top frame has any stamping on it before you glue it to the rest, you don't want to make a mistake and then have to peel them apart.
I did the same thing with the little square with the second sentiment on it using the centre square area saved from the square die and cutting them down to the right size with the appropriate die then gluing them all together and sponging some SU Soft Sky around the edge to finish off.
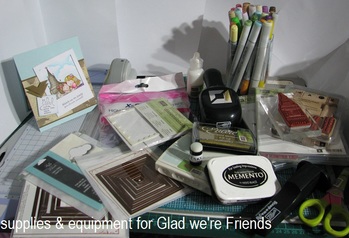
Equipment used is as follows;
Stamps: SU - The Nicest Things, Bloomin' Marvelous & Art by Design. Stamp It - siset055 Yvette
Paper: X-Press It blending paper, SU Soft Sky & Soft Suede. DP Print Block - Timeless Collection World Map
Ink: Memento - Tuxedo Black, Encore - Gold, SU - Soft Sky
Accessories: Spellbinder square and rectangular nesties, Memory Box Puffy Clouds die, SU photo corner punch, SU Stamp-a-ma-jig, Mystick re-positioning dot tape, Scotch Removable Magic tape, craft glue, SU Dimensionals, X-Press It High Tack double sided tape,
Copic markers;
Skin - R0000, R00, R11
Hair Brown - E43, E33, E35
Hair Yellow - Y11, Y15, Y38, E31
Big Ben E50, E55, E57
Green Dress - G20, YG61, YG63
Green Leaves - G14
Pink Dress & other elements - RV10, RV13, RV14
Purple - V01, V06, V09
Sky - 0, B0000, B000, B00


 RSS Feed
